 BBA Design:
Foundations
Advanced Projects
BBA Design:
Foundations
Advanced Projects
Unit 4 - Negative/Positive - Figure/Ground
The Uses of Not
Thirty spokes meet in the hub.
Where the wheel isn’t is where it’s useful.
Hollowed out, clay makes a pot.
Where the pot’s not is where it’s useful.
Cut doors and windows to make a room.
Where the room isn’t, there’s room for you.
So the profit in what is is in the use of what isn’t.
Lao Tzu - Tao De Ching translated by Ursula Le Quin
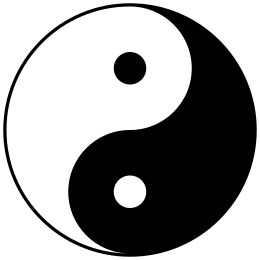
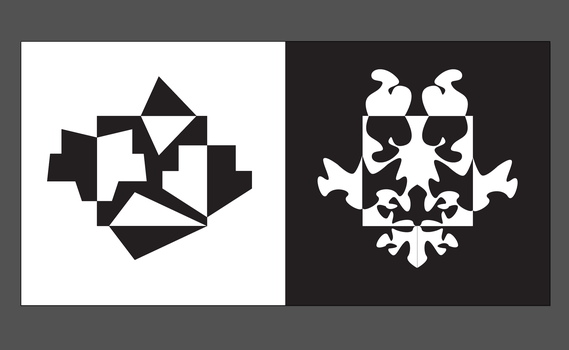
Notan
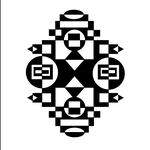
Notan is the Japanese word that refers to dark and light, and the interaction and balance between them. In Japanese aesthetics it has been elevated to an art form in its own right. In western visual art It is also referred to as the Figure/ Ground relationship, and sometimes negative and positive space. It is the most important of all visual relationships to understand and to master: The relationship of what is and what isn't. In this project you will explore the design possibilities of this fundamental visual relationship.
Why is studying the Notan Concept important?
By exploring Notan principles you can create stronger and more effective compositions. Contrasts in value, pattern and shape reduced to their simplest form provide the "bones" or structure of the work.
Project - Expanding the Square - Diptych*
Project 1 - Analog
Project 2 - Digital
Project 3 - 3d laser cut relief (optional)
*What the heck is a Diptych

Please follow the procedures outlined below INCLUDING the proper posting of the work to your e-portfolio There will be two separate assignments in the grade book.
Objectives of the projects
- To explore and understand the use of contrast to create a strong balanced visual composition including: contrast of: figure and ground, light and dark, organic and geometric, symmetry and asymmetry.
- To use both analog and digital tools to create two diptych compositions, that are carefully and thoughtfully designed, made, and well presented.
Criteria of the projects
- There are TWO projects, one analog (paper) and one digital. Each is a diptych (a two part work) work as detailed below.
- Preliminary work done in the sketch/journal.
- Analog and digital versions are well made i.e. able to use the tools and materials effectively. Work is carefully made and presented.
- Work creates a strong dynamic compositions that show an understanding of the concept of BALANCE as it relates to: figure.ground, light and dark, symmetry and asymmetry, rectilinear and curvilinear shape.
- A short written reflection.
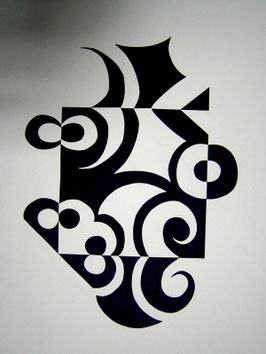
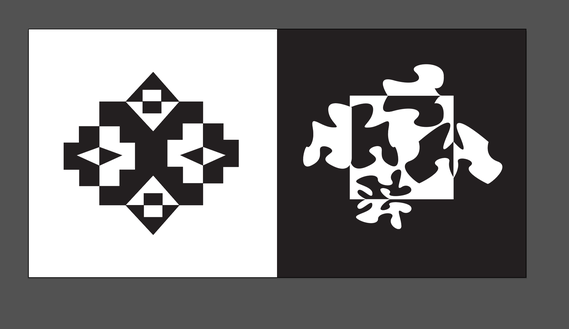
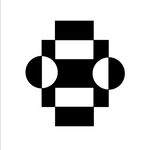
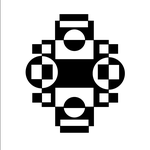
The images below are for reference only and do not show the actual criteria for the project. Please refer to the information below for the requirements for the project.
THE DETAILS:
Create TWO diptych compositions. One will use traditional analog tools and the other will be created digitally in Adobe Illustrator. Reverse the black and white (figure/ground relationship) as in the pictures above,
For the Analog (paper) version : one half of the composition should use organic shapes and asymmetry. The other half should use geometric shapes and symmetry.
For the Digital version you may use a combination of organic/geometric shapes in both halves of the total composition, but make one half symmetrical and the other asymmetrical.
Procedure for the Project
- Create 3 different thumbnail sketches of notan ideas for your analog project.
- Select the most promising one to develop into the paper (analog)notan.
- Photograph your finished paper diptych
- Post your sketch work and finished notan to your portfolio.
Digital:
- Create a digital notan using Adobe Illustrator.
- Take a screen shot of your finished notan and post to your portfolio
- Write the reflection using the prompt below.
Reflection: Post this with your digital project.
- A short written reflection in which you discuss your choices, for both versions of this project. What was challenging, what went well, and what you would do to improve the work? Please use the vocabulary of the unit when writing about your work.
HOW TO MAKE A NOTAN: Watch the video for instruction:
Materials/Tools
Analog version:
Black and white paper:
one black and one white square 4"x4"(the figure) and one black and one white 9x12" square (the ground).
rubber cement or glue stick.
Digital Version: Create your work in Adobe Illustrator following these directions:
- Use the same paper dimensions that you used for the analog version of this assignment.
- Create an art board that is 12" x 18 "
- Create a black rectangle that is 12"x9"
- Then create your two squares: 4"x4" : one white and one black
- Using the techniques demonstrated in class "cut" and "paste" the shapes out just as you did with the paper version.
- Save this as BOTH the original Illustrator file and
Adobe Illustrator : This project will require some degree of skill of using the pen tool. If you are not already proficient in the use of the pen tool, you will find it beneficial to go through the pen tool exercises found in the Resources section of this website, or click the link below (and then the download link) Focus on exercises #1 and #2
Evolution of the Expanded Square


Project 3 - Low Relief Laser Cut Notan (optional if time allows)


When thinking about 3D work, we can speak of degrees of Dimensionality.
This project is concerned with Low or Basso Relief.
In plastic art, relief sculpture is any work which projects from but which belongs to the wall, or other type of background surface, on which it is carved. Reliefs are traditionally classified according to how high the figures project from the background. Also known as relievo, relief sculpture is a combination of the two-dimensional pictorial arts and the three-dimensional sculptural arts. Thus a relief, like a picture, is dependent on a background surface and its composition must be extended in a plane in order to be visible. Yet at the same time a relief also has a degree of real three-dimensionality, just like a proper sculpture.
Reliefs tend to be more common than freestanding sculpture for a number of reasons. First, a relief sculpture can portray a far wider range of subjects than a statue because of its economy of resources. For instance, a battle scene, that, if sculpted in the round, would require a huge amount of space and material, can be rendered much more easily in relief. Second, because a relief is attached to its background surface, problems of weight and physical balance do not arise - unlike in statues and other freestanding sculptures where weight and balance can be critical. Third, because reliefs are carved directly onto walls, portals, ceilings, floors and other flat surfaces, they are ideally suited to architectural projects - typically the greatest source of sculptural commissions - for which they can provide both decorative and narrative functions.
Process
Take one half of your digital version, or create a new design (KEEP IT SIMPLE)
Prepare for laser cutting (will demonstrate)
Cut a piece of tagboard to the size: 7x11"
Follow directions for laser cutting (will demonstrate).