 BBA Design:
Foundations
Advanced Projects
BBA Design:
Foundations
Advanced Projects
Drawing
Contour Drawing
Contour drawing is a drawing technique that emphasizes a slow careful approach that focusing exclusively on line. There are different kinds of contour drawing and the technique is a great way to begin drawing, as well as being a legitimate technique on its own. Contour drawing is often uses as a warm up exercise, a preliminary or base drawing and also in combination with other techniques.
The purposes of contour drawing are:
- It trains the eye and the and hand to work together.
- It forces you to work slowly and carefully - to really look at what your drawing.
- It emphasizes drawing what you actually see in front of you, rather than what you think you see.
In contour drawing the lines that are drawn are:
- Continuous - without lifting the pen off of the paper.
- there is no erasing or stopping to change something.
- They are drawn slowly.
- They trace around the edges AND articulate the various boundaries between different planes and elements of the object.
The are three basic types of contour drawing. These are (in the order in which they are usually taught and practiced):
- Blind contour - looking at the object 100% of the time - and not at the paper ever!.
- Modified contour - looking primarily at the object -80% of the time. You may look at the paper sometimes to adjust your drawing.
- Contour- looking back and forth from the object to the paper but still following the other basic rules (see above).
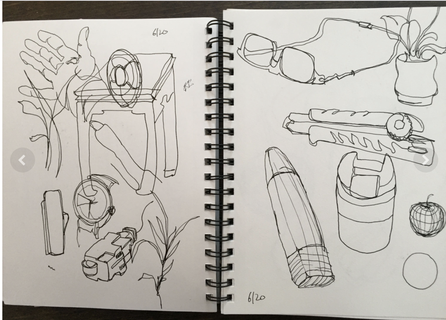
Exercises
Exercise # 1
Blind Contour of your non-dominant hand - 1 min.
Blind Contour of your non-dominant hand - 2 min.
Exercise #2
Blind Contour of your classmates face - 2 min.
Modified Contour of your classmates face - 3 min.
Exercise #3
Blind contour of a water bottle or other suitable object - 1 min.
Modified drawing of the same object - 2min.
Full contour drawing of the same object - 5 min.
Negative Space Drawing

After being introduced to contour drawing another good practice technique, which builds on contour drawing is that of Negative space drawing.
Pictorial space is usually thought of as a relationship between the object (the positive space, or figure) and the background (the empty space around the object or the ground).
In negative space drawing you draw the negative spaces around and within the object - just as they appear to you as abstract shapes, rather than drawing the object directly. The" object" gradually "appears" as you complete the negative shapes.
This drawing technique is important for a couple of reasons: First it trains your eye and mind to pay attention to the spaces between objects in a picture. This is important because those negative spaces are just as important as the positive spaces in a composition. Second, by doing so, it will actually help your observational drawing in general, because it will force you (like contour drawing) to look closely at what is actually in front of you - instead of drawing what you think something is.
Exercises
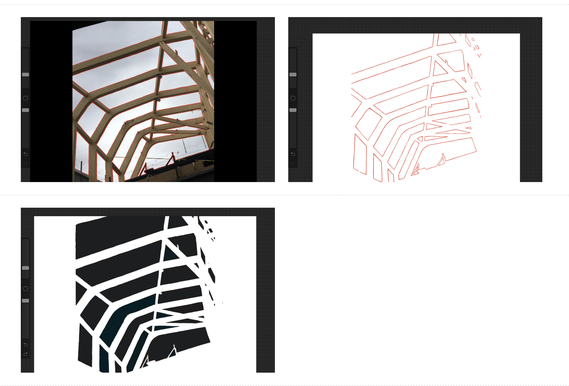
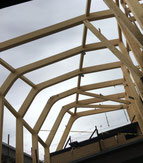
Exercise #1 - Trace the negative spaces in a photograph
Using the image provided:
- Print out the image.
- Tape it to the surface of a window that has a strong light coming through it.
- Take a clean sheet of paper and place it over the first
- Carefully trace around all of the major negative areas (in the case use the light colored sky areas)
- Color in with black sharpie all of the negative spaces. (make sure to put a piece of scrap paper underneath you work as the sharpie tends to bled through the paper.
You may also do this exercise digitally using Procreate on your Ipad. If doing digitally:
- Import the image into procreate, create a new layer do your outline of the image.
- Create another layer, and do the black fill
- Turn off the bottom layers and export the image to your portfolio.
If you are doing this exercise by hand
If you are doing this project digitally, upload this file(drag to app or desktop)
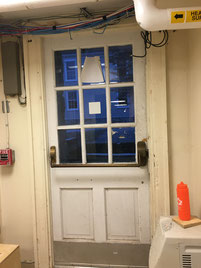
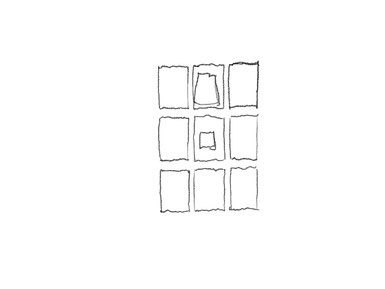
Exercise #2 - Draw a window.
- Draw just panes of glass in a window or door in your home. Draw this from directly from observation.
- Sit a medium distance from the door or window so that you can see the entire thing.
- Draw just the GLASS not the frame!
- Pay attention to the exact proportions of the glass
- Pay attention to the relationship of the individual panes of glass to each other
- Pay attention to the alignment of the panes of glass
- photograph both the original window/door and your drawing and post both to your portfolio and submit in onCampus
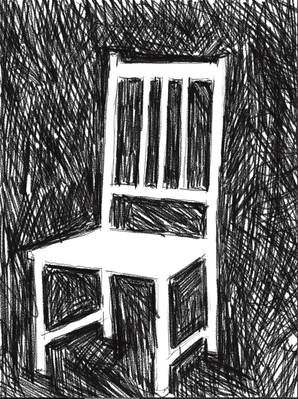
Exercise #3- Draw a photograph of a chair.
In this exercise you will be working again, from a photograph which is provided below. There is also a short instructional video which you can watch if you need additional instruction on the negative drawing technique.
This exercise can be done in your sketchbook, or digitally in Procreate. Please do not trace this - try to draw to the best of your ability, what you see in the image.
Watch the video:
Use the image of a chair below for your drawing.

Exercise #4 - Draw a simple object using the negative space approach from direct observation.
Select a fairly simple object that has some interesting negative shapes , such as another chair, or stool. Other objects could be: a plant, perhaps a small step ladder, some simple tools from the kitchen or workshop (make sure they have interesting negative shapes within them! Part of a larger more complex object such as a bicycle or exercise equipment.
In your sketchbook: using the full page draw the object to the best of your ability using the techniques you have been practicing. Draw from a real object - not from a photograph of the object.
Use a fairly light pencil line and adjust and erase as needed until the shapes seem right and your object emerges from the page! After its perfect -
Fill in the NEGATIVE shapes with dark pencil or black sharpie.